Creating a daynamic resume I can easily update and share with R, {pagedown}, and some basic {rmarkdown} functionality,
R
pagedown
Author
Matt Leary
Published
July 8, 2023
Refreshing an old Post
I took an old post generated on my previous {blogdown} website and ported it over to quarto. I made slight updates to line it up with current format, but otherwise tried to just reuse the old material found here.
Yihui Xie & Romain Lesur’s {pagedown} package allows users to create paged HTML documents that can be easily printed as PDFs. This includes RMarkdown templates that let you create letters, business cards, and most importantly resumes. I previously explored using {pagedown} for my resume and was impressed with the unique look it provided. That said, I never actually finished my exploration and I recently wanted to go back to {pagedown} and create a new resume.
Intent
I had four main goals with this project:
Create a resume format that was unique but not overly “flashy”
Modify pagedown’s base styling to work on my understanding of CSS
Develop a process that made it easy to update my resume periodically (see the repo here)
**Acknowledgement: Shout out to Nick Strayer, whose code was the basis for my format. I heavily borrowed from his code and approach. See his resume here
Creating my custom resume
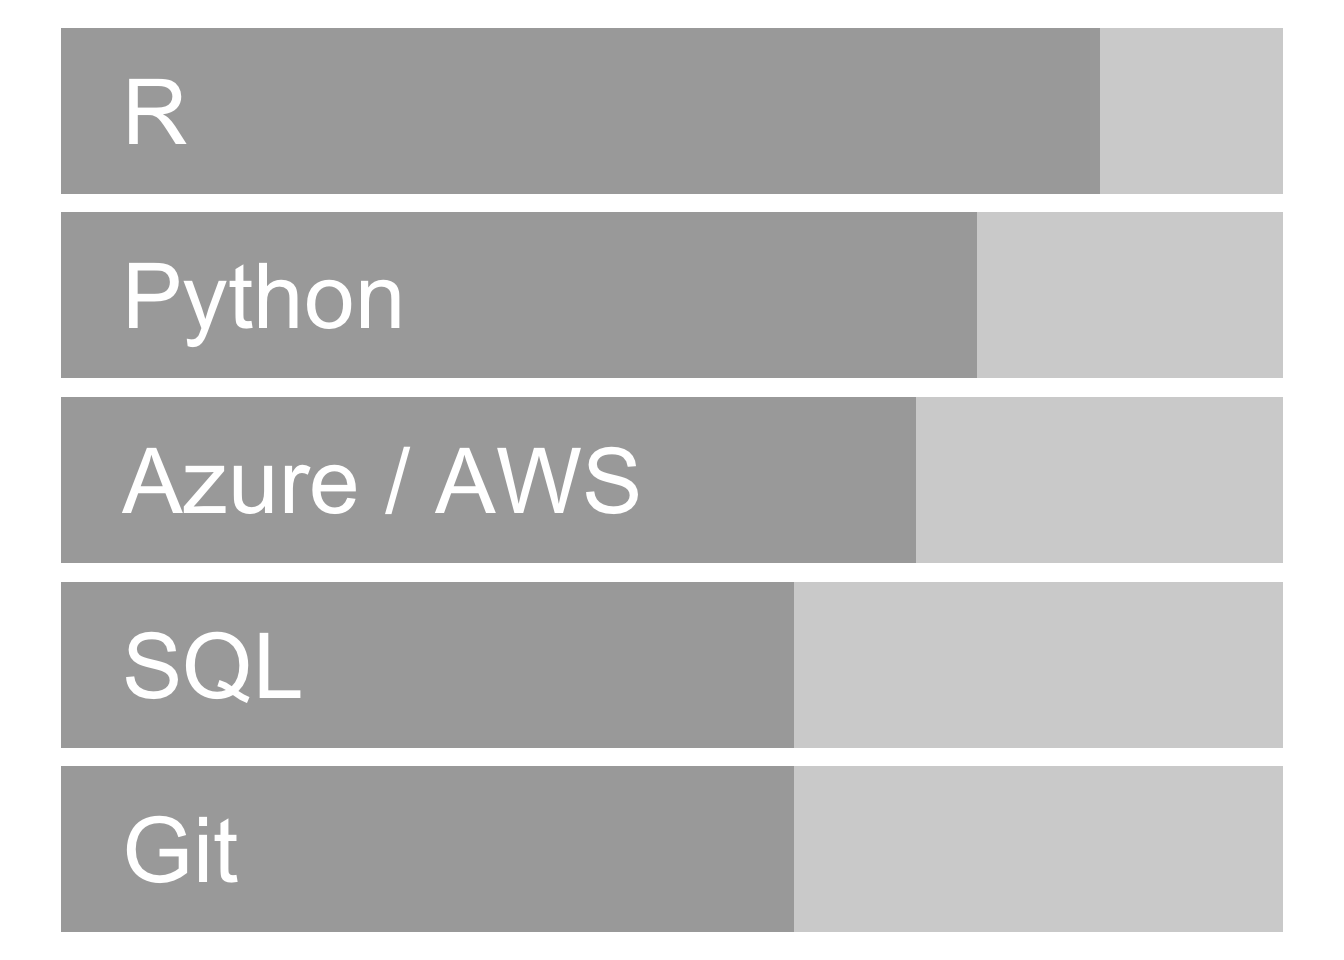
After some quick research on {pagedown} examples, I stumbled upon Nick Strayer’s resume. I liked the subtle changes he made to the base {pagedown::html_resume}, and decided to leverage his format & approach. For example, I really liked his use of “skill bars” to highlight his coding experience.
Here some of my major steps I took to fully leverage {pagedown} resume template.
Updating the CSS
With limited CSS experience, this step took the longest as I explored CSS syntax and the resulting output. I’ll ignore the actual CSS code and the changes I made, but the process of adding a custom CSS file was simple. First, create a .css file with the changes you want to make. After that, add a few lines of code to the YAML header of the markdown template (seen below).
Note that with this setup, the base CSS template is still used but is overwritten by my custom CSS files. I also created a css folder to house the files, which appeared to be a best practice.
Creating an Excel file for data
Rather than hard coding my work and education experience in the Markdown document, I liked the approach of creating a separate excel file with all the necessary data for my resume. This way it is easier to update my experience and in theory I could use that file to populate different resume versions, websites, etc..
Producing multiple versions
I wanted to create two different versions of my resume, one with color and a plain version for easier printing. That said, I did not want to maintain to separate RMarkdown documents since that would require me to update TWO documents to ensure they were both always up to date. While this wouldn’t be an overwhelming burden, I also suspected it would lead to two versions with minor differences.
Using the render function from the **rmarkdown** package, I was able to easily update both versions at the same time. With this function, you can take an rmarkdown file and control some of the output settings. For example, I was able to control the output file name, the css settings, and any individual parameter settings used in the YAML settings.
This was really helpful to learn for future projects. Saving the output as a different name is something that could helpful in other circumstances. For routine reports that might be ran periodically, it would be helpful to use this function to save the output with the current date. Another use case would be to create template format and than create multiple outputs for a list of items using the **purrr** package.
Lessons Learned
The process was relatively straightforward and lead to learning several new R tips that could be applied elsewhere. My major takeaways are listed below.
* Google is your friend. The {pagedown} documentation was great, but finding Nick’s example really helped me develop a resume I liked.
* Rmarkdown is awesome. I already thought this, but a simple trick like rendering an existing Rmarkdown with specific parameters means I can know do even more with the package.
* CSS styling is nuanced, but it also adds a lot. I am not a CSS expert, but with some simple research and a LOT of experimentation I was able to quickly make changes. I’ve used CSS to create a custom {rmarkdown} template at work, and that little addition really makes the report stand out.